INFO ONLY. NOT FOR SALE. P88-4
Inert U.S. M26 Anti Personnel Mine, Bounding,Curio
Statement by person I got this item from:
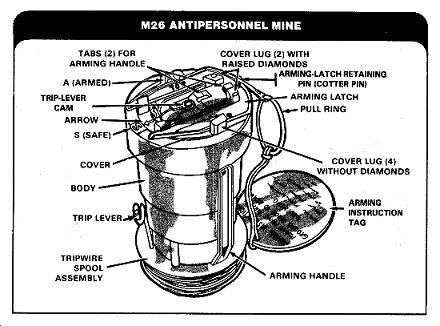
This mine is in "GOOD CONDITION" and is the "REAL THING". It is very rare. This mine was low ordered by rifle disruption. You can see the exit hole from the 5.56mm round. The fragmentation ball was ejected from the mine body and detonated as designed. The bounding fragmentation ball has been replaced by a tennis ball of the same size and painted O.D. Green. The tennis ball is needed inside in order for the rest of the mine components to fit in and around the mine where the origial fragmentation ball was positioned. There is no arming fork. The rest of the mine components were recovered and the mine is complete for the exception 0f the trip wire tilt rod that extends up the center of the top of the mine. It was too damaged and I remanufactured the rod. As you can see in the pictures, the safe/arm selector rotates just fine to Safe (S) and Arm (A) which are stenciled in yellow paint.
M26, ANTIPERSONNEL MINE
This is a small, bounding, fragmentation mine. It can be set for either pressure or trip-wire activation. A pressure of 13 kg (28 lb) on top of the mine, or a pull against the tripwire will detonate it.
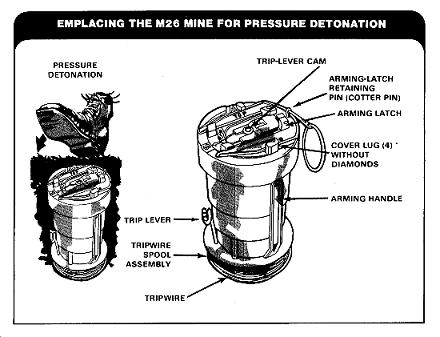
To emplace an M26 mine for pressure detonation:
- Dig a hole in the ground about 13 cm (5 in) deep and wide enough to accept the mine.
- Remove a 2.5 cm (1 in) layer of dirt out to about 15 cm (6 in) from around the mine to allow knuckle clearance needed when turning the arming handle.
NOTE: Leave the tripwire spool assembly attached to the mine This helps to stabilize the mine in the hole.
- Remove the arming handle from the tripwire spool by pulling it upward from the spool.
- Close the spread ends of the arming-latch retaining pin (cotter pin) to aid its removal after the mine is emplaced.
- Place the mine in the hole, with cover end up, so that the mine cover lugs extend just slightly above ground level.
- Pack the dirt around the mine, leaving the cover lugs exposed.
- Remove the arming-latch retaining pin by pulling the ring straight up.
- Attach the arming handle to the lugs on the arming latch. Hold the mine firmly with the thumb and finger of one hand to keep it from turning. Turn the cover clockwise (about 1/4 turn) until it stops.
The arrow on the mine cover should be slightly past the center of the red A (armed) position.
- Camouflage the mine.
- Remove the arming latch from the mine by pulling straight out on the arming handle. Keep the arming latch and arming handle for future use. The mine is now armed.
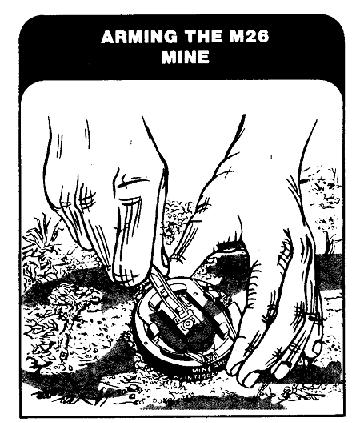
To disarm and remove an M26 mine set for pressure detonation, reverse the steps used to arm and install the mine.
- Carefully remove all camouflage from around the top of the mine.
- If there is any sign of boobytrapping or tampering, do not try to disarm and remove the mine. Instead, destroy the mine in place.
- If there are no signs of boobytrapping or tampering, replace the arming latch by sliding it under the arming handle lugs from the side opposite the arrow.
- Make sure that the middle prong of the arming latch engages the trip-lever cam.
- Remove a 2.5 cm (1 in) layer of dirt out to about 15 cm (6 in) from the edge of the mine to allow knuckle clearance.
- Attach the arming handle to the arming latch.
- Hold the mine with one hand and turn the cover counterclockwise with your other hand until it stops (about 1/4 turn).
- The arrow on the cover should line up with the S (SAFE) position on the mine.
- Remove the arming handle.
- Insert the arming-latch retaining pin through the holes in the arming latch and mine body. (It may be necessary to rotate the latch back about 1/2 cm [1/4 in] to align the holes.)
- Remove the mine from the hole.
- Clear the mine and repackage it.
To emplace an M26 mine for tripwire detonation:
- Dig a hole in the ground about 13 cm (5 in) deep and wide enough for the mine.
- Remove a 2.5 cm (1 in) layer of dirt out to about 15 cm (6 in) from around the mine to allow knuckle clearance needed when turning the arming handle.
- Remove the tripwire spool assembly by pulling it away from the mine body.
- Remove the arming handle from the tripwire spool by pulling it upward.
- Unscrew and remove the trip lever from the tripwire spool.
- Remove one or more tripwires, as required, from the tripwire spool by pressing in on the plastic tripwire retainer(s) and lifting the tripwire(s) off the top of the spool.
- Retain or replace any unused tripwires on the spool.
- Replace the tripwire spool assembly on the mine. Leave the spool on the mine to help stabilize it.
- Close the spread ends of arming-latch retaining pin (cotter pin) to aid its removal after the mine is emplaced.
- Place the mine in the hole with the cover end up, so that the mine cover lugs extend just slightly above ground level.
- Pack the dirt around the mine, leaving the cover lugs exposed.
- Screw the trip lever about four turns into the trip-lever cam (in the top center of the mine cover) until it is tight.
- Cut the tape holding the coils of wire.
- Attach the loop end(s) of the tripwire(s) to the loop of the trip lever.
- Leaving some slack, attach the other end of the tripwire(s) to a firm anchor stake(s).
- Remove the arming-latch retaining pin by pulling the ring straight up.
- Assemble the arming handle to the lugs on the arming latch. Hold the mine body firmly with your thumb and finger of one hand to keep the mine from turning. Rotate the cover clockwise (from S to A) until it stops (about 1/4 turn).
- Camouflage the mine.
- Remove the arming latch from the mine by pulling straight out on the arming handle. Keep the arming latch and arming handle for future use.
- The mine is now armed.
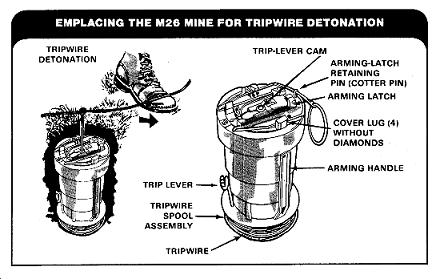
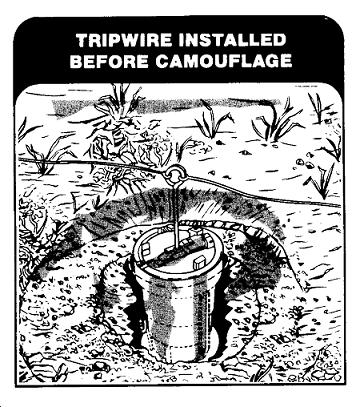
To disarm and remove an M26 mine emplaced for tripwire detonation, reverse the steps used to arm and install the tripwire detonation.
- Carefully remove all camouflage from around the mine.
- If there is any evidence of boobytrapping or tampering, do not try to disarm and remove the mine. Take care not to move the trip lever or press on the mine cover.
- Replace the arming latch. With the two raised arming handle lugs facing upward, slide the arming latch under the six lugs of the mine cover from the side opposite the arrow. Make sure that the middle prong of the arming latch engages the trip-lever cam.
- Remove a layer of dirt about 2.5 cm (1 in) deep for a distance of about 15 cm (6 in) from the edge of the mine to allow knuckle clearance for turning and removing the arming latch.
- Attach the arming handle to the lugs on the arming latch.
- Hold the mine with one hand and turn the mine cover counterclockwise with your other hand until it stops (about ¼ turn).
- The arrow on the cover should point to the S (SAFE) position on the mine body.
- Remove the arming handle from the mine and keep it for future use.
- Insert the arming-latch retaining pin through the holes in the arming latch and mine body. It may be necessary to turn the latch back (up to ½ cm [¼ in]) to align the holes of the latch and body.
- Remove the mine from the ground. Clean the mine and repackage it.